Sunday, November 13, 2011

Crunchy Nut Bars

In my post on Coconut Granola Bars, I mentioned that I've been looking for the perfect bar recipe for ages with very little success.  Well, in a stroke of really good luck, it seems like I've found two great recipes in just a few short weeks!  One of the blogs I follow is called Enlightened Cooking, and cookbook author Camilla has tons of bar recipes, many of which look great, but use nut butters or dates (which I don't much care for), or lots of sugar to stick together.  But recently she posted recipes for replicas of TRIO and KIND bars.  I had no idea what these were until I happened to be given a free sample of an almond coconut KIND bar, which turned out to be delicious.  I went back to check out the recipe more carefully and found out that this recipe meets pretty much all of my criteria - wholesome ingredients, no nut butters or dates, moderate sugar, and a simple process.  Could this be for real?

I tested it out, and sure enough these bars were not only easy to make, but they tasted great!  Light, crunchy, and a little bit sweet.  I even brought a few to a friend with a new baby, and she immediately asked me for the recipe (for when the baby is not so new anymore of course :).  So while I am a big fan of the taste of the Coconut Granola Bars, I am completely sold on the simplicity of these bars.  I just made batch #4 today and love having these around to snack on!  I made a few tweaks to the recipe to suit my taste, so definitely check back to the original post for more ideas for including dried fruits, seeds, etc.

Almond Coconut Bars


Walnut Coconut Bars


Crunchy Nut Bars
adapted from Enlightened Cooking

2 1/2 cups roughly chopped almonds or walnuts (measured before chopping)
2/3 cup unsweetened dried coconut (shaved or shredded)
2/3 cup crisp brown rice cereal
1/4 teaspoon fine sea salt
1/2 cup honey or brown rice syrup

Toast the nuts by placing in a dry pan over medium heat, shaking every couple of minutes while you prepare the rest of the ingredients.

Preheat oven to 325.  Line a 9x13 inch pan with parchment paper, letting the paper come up on two sides to form "handles".  (Alternatively, line with foil AND spray with oil.)

In a medium bowl, add the coconut, rice cereal, and salt.  By this point the nuts should be toasty enough; add them to the bowl and mix.  (Note, if you are using large shavings of coconut, you might want to keep it aside and throw it in the hot pan for a minute or 2 after the nuts are done toasting to highlight the coconut taste).

Add the honey or brown rice syrup and mix until all ingredients are well coated.  Transfer to prepared pan, spread as best you can using a spoon, and then use a piece of parchment paper or sprayed foil to push down the mixture evenly throughout the pan.

Bake for 18 minutes and remove to a rack (the bars will still seem really soft, but they are ready to come out!).  Cool for 10 minutes, until the bars are set enough to remove from pan but still warm, and use the parchment or foil handles to transfer to a cutting board.  Cut into your desired number of bars and cool completely.  If you are using foil, the bars may stick until they are 100% cool but they should release easily at that point!  If you still have trouble, place bars in the freezer for a little bit and then try again.

Bars will keep for several days in an airtight container at room temperature, or can be frozen.

Saturday, November 12, 2011

Guest Blog

Hi everyone!  I usually stick to recipes and their stories on this blog, but in addition to cooking, I spend tons of time reading, thinking, and talking about the best ways to feed kids.  This week, my friend Laura Cipullo at Whole Nutrition Services asked me to guest blog about how I feed my kids on her new blog, Mom Dishes it Out.  Here's the link if you're interested!

Sunday, November 6, 2011

Coconut Granola Bars

Most of you are probably unaware, but I have been obsessively making various kinds of granola and protein bars for months. I have a serious addiction to NuGo Organic Double Dark Chocolate protein bars, which I have been trying to break for ages. Not only are they expensive and loaded with sugar, but I hate eating so much processed soy, and the ingredient list, despite being organic, is a mile long. But after searching and searching, and trying recipe after recipe, I could not find a single one worthy of sharing. It has been a frustrating endeavor to say the least! The problem, I think, is that I have an unrealistic set of expectations here - I am looking for a bar that tastes good, isn't too annoying to make, includes lots of wholesome ingredients, and isn't too high in sugar. And did I mention I'm not a fan of the fruit and nut style bar (like Lara bars), and that I don't really like nut butters either? This is a problem in bar making because apparently the most popular binders are some form of sugar in large quantities (brown rice syrup, honey, etc), peanut butter, and dates, all of which I've pretty much eliminated. I started thinking that my perfect home made replacement was a pipe dream, unless, of course, I relaxed my standards a bit!

In a stroke of good luck, just as I was finishing the last NuGo bar in the box I swore was going to be the last, Martha Rose Shulman posted some recipes in the NY Times on healthy snacks for teenagers. Among them was a coconut granola bar recipe that actually had what I'd consider a reasonable amount of sugar for a bar! Unfortunately it requires a lot of steps, but in the interest of being open-minded, I decided to give it a try to see if the effort was even worth it. As it turns out, these are the best bars I have made yet! They do not crumble, aren't bland, don't have a weird taste from a weird ingredient (black bean chocolate protein bars anyone??), and even resemble real granola bars! In fact, they taste just like the Nature Valley Oats 'n Honey bars - crunchy, toasty, and sweet. I'd love to reduce the sugar a bit, but I think they probably won't hang together. In the mean time, they are a nice afternoon treat when I am wanting something sweet that also has some wholesome ingredients to tide me over until my next meal!


Coconut Granola Bars
adapted from NY Times

1/4 cup canola oil, plus additional for the pan and for your hands
2 cups rolled oats
1 heaping cup flaked coconut
1/2 teaspoon cinnamon
1/4 teaspoon freshly grated nutmeg
1/4 teaspoon salt
1/2 cup honey
1 teaspoon vanilla
1 cup lightly toasted walnuts (or nut of your choice), coarsely chopped

Preheat the oven to 325 degrees Fahrenheit. Place the oats in a bowl and toss with the oil until thoroughly coated. Line a baking sheet or pan with parchment and spread the oats in an even layer on the parchment. Place in the oven and toast for about 20 minutes, stirring halfway through, until the grains are lightly toasted.

While the oats are toasting, add the coconut, spices, salt and nuts to the bowl. Add the oats when they are done and mix. Turn the oven down to 300 degrees.

Place the honey and vanilla in a saucepan that can accommodate at least three times the volume of the honey, and bring to a boil over medium heat. Reduce the heat to low and simmer 5 minutes. Remove from the heat and pour over the oat mixture. Stir until the oat mixture is evenly coated with honey.

Oil a 9x13 pan, line with parchment so that parchment sticks up on the sides, and then oil the parchment. Scrape the granola mixture into the pan and spread in an even layer, using a piece of parchment to spread it out. Place in the oven for 25 minutes, until just golden. Do not allow to become too brown, or the bars will be too hard. Remove from the heat and allow to cool for about 10-15 minutes, until still warm but set enough not to crumble when you pick them up on the parchment. Place on a cutting board and cut into your desired shape, and then allow to cool completely. Store in an airtight container at room temperature for a few days, or freeze.

Monday, September 26, 2011

White Whole Wheat Bread (Bread Machine)

Would you believe me if I told you that you could make a sandwich bread at home that's 100% whole grain, simple as can be, and is light and fluffy?  If you took my advice and have a bread machine, you can try this recipe for yourself and see if you agree!  As I have told you over and over, white whole wheat flour is a whole grain baker's best friend, especially if you don't always want your baked goods to be heavy and dense.  I am a huge fan of a traditional whole wheat bread, but sometimes I just want something lighter, and that's where this recipe comes in.  It's great for sandwiches, as a side for soup, as the basis for croutons, or even to make delicious french toast.  And if you are cooking for others who are not whole grain converts, or are trying to ease your family into a more wholesome lifestyle, I promise you won't get any complaints!


White Whole Wheat Bread
adapted from The Bread Lover's Bread Machine Cookbook

1 1/4 cups water
1/4 cup agave, honey, or maple syrup
2 tablespoons oil

3 1/4 cups white whole wheat flour
1 tablespoon vital wheat gluten
1 1/2 teaspoon salt

2 teaspoons SAF yeast (2 1/2 tsp bread machine yeast)

Add all ingredients to bread machine as directed for your model.  Set for whole wheat cycle (on my machine with SAF yeast I use quick wheat).  When bread is done, remove from pan immediately and allow to cool completely on a rack before slicing.

Makes a 1.5 lb loaf

Friday, September 9, 2011

Salmon Burgers

Here we go with another late-summer burger recipe, this time featuring salmon!  Throughout my life I have not been a huge fan of food that "lived under water", but with all of the talk about salmon being such a healthy food, I felt I owed it to myself and my family to get it into the rotation.  I'm proud to say I've found quite a few variations that I really love - Maple Glazed Salmon, Salmon Cakes, and even some canned salmon mixed with mayo for an easy lunch.  Earlier this summer, I was shopping in Whole Foods and saw that salmon burgers were on special, only $2.50 instead of $5.00 each for a burger made with wild salmon, so I had to try them.  They grilled up beautifully and were delicious, but the regular price just seemed excessive for something I should be able to make at home!

Of course I decided to try to make them one afternoon when my fridge and pantry were sparse (we were even out of soy sauce!) and no time to go to the store, so when I went searching for recipes I was very limited on what I'd be able to try.  I came across a somewhat odd sounding Rachael Ray recipe for "Everything Salmon Burgers" which seemed to be trying to replicate the flavor profile of an everything bagel with lox and cream cheese.  That was a little much for me, but I liked the stripped down idea for the burger (well, it sounded good enough and I could make it quickly with what I had on hand!).

The result was perfect for me...with all of the seasoning and grilling, the salmon taste is not overly strong, but the burgers are flavorful, easy to throw together, and such a great way to eat more fish.  Note that I would NOT recommend going out and spending $20/lb for fresh wild salmon for this recipe - it is perfect for when you can get wild salmon at a bargain price.  My favorite is frozen wild salmon from Trader Joe's, which comes already skinned for $7.99/lb!  The previously frozen kind doesn't have the best texture when cooked as a filet, but is the perfect solution in a recipe like this :)


Salmon Burgers
adapted from Food Network

2 6-ounce skinless wild salmon fillets, cut into large chunks
1 tablespoon grill seasoning
1 tablespoon sesame and/or poppy seeds (I used all sesame)
1 rounded teaspoon dried dill (or 1 tablespoon fresh dill, chopped)
Olive oil for drizzling

Preheat outdoor grill if using to medium high. Prepare hot grill with cooking spray. 

Place salmon in food processor and pulse a few times to coarse grind meat to form burgers (do not puree!). Transfer fish to a mixing bowl and season with grill seasoning, seeds, and dill. Mix and form 3 patties. Drizzle the burgers with extra-virgin olive oil.

Cook burgers 3 minutes on each side.

Serve on toasted 100% Whole Wheat Hamburger Buns with Lemon Dill Sauce and your favorite toppings (we love beefsteak tomato and avocado slices!).

Serves 3

Thursday, September 8, 2011

Yogurt Veggie Dip

As a kid (and young adult!) I used to look forward to family get-togethers, where there would almost always be a bowl of onion dip made from sour cream and dried soup mix, which I would load onto potato chips.  Healthy, right?  This is a snack I wouldn't dream of serving now that I focus more on real foods, but that doesn't mean I don't want to ever have dip again!  Last year I blogged about this recipe for Spinach Leek Dip which is simple enough, but does require a cooking step I probably wouldn't be willing to do all of the time just for a dip.

I recently decided to invest in Mark Bittman's book How to Cook Everything, since those of you who follow me on Facebook might have noticed I'm a big fan of his!  I figured if I'm going to read his blog and share his articles, the least I could do is support him by buying his highly rated cookbook.  Well, as it turns out, this book really does have a recipe for everything, including simple-as-can-be dip.  This was great timing, as I've been trying to snack on raw veggies, and have been dipping them in organic store-bought ranch dressing for convenience - a decent compromise, but not as wholesome as I'd like.  An easy dip that I can make regularly would be perfect!

Bittman give the option of making this basic dip with sour cream or yogurt, so I started with the yogurt option to maximize the wholesomeness, adding just a little bit of mayo for additional texture and richness.  And guess what - while not as thick as a sour cream dip, this version was delicious!  I served it to some friends who could not get enough, and it made me so excited to pull some veggie sticks out of the fridge for the rest of the week :)


Yogurt Veggie Dip
adapted from How to Cook Everything

1 3/4 cups yogurt*
1/4 cup mayo
3 scallions or 1/2 small red onion cut into chunks
1 cup mixed raw vegetables cut into chunks (e.g., carrots, seeded cucumber, bell pepper)
1 rounded teaspoon dried dill (or 2 tablespoons fresh, chopped)
Salt and pepper, to taste

Add the yogurt and mayo to a bowl.  In a mini-chopper, mince the raw veggies so that they are in tiny pieces but not pureed, and add to bowl with yogurt (you don't want the veggies, especially the onion, to get watery - if you go too far, just drain before adding to yogurt).  Add dill and a sprinkle of salt and pepper, and mix to combine well.  Taste and adjust seasoning to your liking.

Makes 3 cups of dip

*Greek yogurt is best here due to its texture.  Regular yogurt will taste great, but the dip will be on the runny side, so you could also consider straining a bit before using.  Alternatively, add more mayo or mix with sour cream for a stiffer dip.

Saturday, August 20, 2011

Basic Cole Slaw

For a long time I thought I didn't like cole slaw.  I am generally not a huge fan of mayo, and also assumed that I didn't like cabbage for no particular reason (I am slowly working my way through all of the foods I still have residual fears of from being a really picky kid!).  A few years ago I made a slaw that didn't contain mayo, just a vinegar based dressing, and realized that I actually really like cabbage.  And then more recently I figured out that my aversion to mayo-based salads is that most of them use WAY too much mayo, making them heavy and "goppy", as my mother would say.  As a result, I started experimenting with homemade slaw, and have been pleasantly surprised.  Crisp, freshly shredded cabbage tossed lightly with some sweet and vinegary dressing is really enjoyable, either as a topping for something like Barbecue Turkey Burgers or as an all-purpose side dish for any grilling event.  This recipe is classic, easy to put together, and really delicious.  


Basic Cole Slaw
adapted from Epicurious

1/3 cup mayonnaise
2 tablespoons cider vinegar
1 tablespoon sugar
1/2 teaspoon Dijon mustard

3 cups finely shredded cabbage
1 large carrot
1/2 red onion

In a large bowl whisk together mayonnaise, vinegar, sugar, and mustard.  Add the shredded cabbage, and grate the carrot and onion on top.  Season with salt and pepper and toss together, tasting and adjusting seasoning as needed.  Cole slaw may be made 4 hours ahead and chilled, covered.  Serve as a topping for Barbecue Turkey Burgers or as a side for any summer meal.

Barbecue Turkey Burgers

Sorry it's taken me until mid-August to post this recipe, but at least it's in time for your Labor Day barbecue!  I am a big fan of a traditional hamburger made with grass fed ground beef, but every once in a while I like to switch things up and use turkey.  I've found, however, that a lot of turkey burger recipes require a ton of ingredients, presumably because otherwise it's hard to keep the turkey moist and flavorful?  So when I came across this recipe I was really excited - this homemade barbecue sauce is so simple, contains only ingredients that you could easily have on hand all the time, and is delicious on its own.  But the beauty of this recipe is that the sauce is also used to add flavor to the burgers and keep them moist at the same time!

I made some changes to the original recipe to simplify things (and increase the amount of sauce mixed in with the meat) and am very happy with the results.  They were also paired with a cole slaw recipe which came out great, but is totally optional as a topping - these burgers are great just with some sliced tomato or whatever else you like on your burgers.


Barbecue Turkey Burgers
adapted from Epicurious

Barbecue Sauce
1/4 cup Worcestershire sauce
1/4 cup ketchup
2 tablespoons soy sauce
1/2 teaspoon salt
1 teaspoon chili powder
1/4 teaspoon ground cumin

Turkey Burgers
1 pound ground turkey (I like a combination of white and dark meat; all white meat will be more likely to stick to the grill and dry out)
1/4 cup bread crumbs (fresh or dried)
1 small onion, minced (optional)

In a small bowl stir together Worcestershire sauce, ketchup, soy sauce, salt, chili powder, and cumin until sauce is smooth.

In a large bowl stir together turkey, bread crumbs, onion (if using), and 1/4 cup sauce until combined well and form into 4 patties. Burgers may be prepared up to this point 1 day ahead and chilled, covered. Divide remaining sauce in half and put in separate bowls, half for brushing burgers on the grill and half for drizzling on cooked burgers. Chill sauce, covered.

Preheat grill to high heat.  Spray rack and grill burgers, brushing frequently with barbecue sauce, 5 minutes on each side or until cooked through.

Serve on 100% Whole Wheat Hamburger Buns (or your favorite rolls or buns!), and top with additional barbecue sauce, Basic Cole Slaw, and/or your favorite burger toppings.

Serves 4

Monday, July 11, 2011

Pumpkin Muffins

A few weeks ago I ended up with some free time with the munchkin while the peanut was napping.  My freezer stock on muffins was getting low and we were having company that weekend, so I thought a baking project might be fun.  When I asked her what kind of muffins we should make, she chose pumpkin.  Hmmm...I have been trying to find a recipe for wholesome pumpkin muffins for a long time, since most traditional recipes are loaded with sugar and fat.  First I tried this one which was kind of yucky, and then I found this one which is delicious and so healthy, but not entirely pumpkin.  When scanning through my muffin recipes, though, I realized my Whole Wheat Apple Muffins might be the perfect one to modify!

My only issue with a straight substitution of the 1 cup of apple sauce for 1 cup of pumpkin, though, was that I would likely end up throwing away half a can of pumpkin puree (yes, I know, I should be able to find another use for the rest of that pumpkin but the reality is I'm not always that organized!).  So I wondered what would happen if I just threw the whole thing in the batter...and voila!  The extra veggie puree just seems to make the muffins more moist, but didn't weigh them down at all.  I love these muffins, and the munchkin LOVES these muffins - she has requested them three times since the original batch!  Unlike most heavy pumpkin baked goods, these are light and almost flaky, barely sweet, and have just enough cinnamon to highlight the pumpkin without being overpowering.  Even hubby, who is not much of a pumpkin fan, isn't opposed to eating these - I'll take that as the highest compliment of all :)


Pumpkin Muffins

Dry Ingredients
2 1/2 cups whole wheat pastry flour
1/2 cup granulated sugar
2 teaspoons baking powder
1/4 teaspoon baking soda
1/4 teaspoon salt
1 rounded teaspoon cinnamon

Wet Ingredients
1/2 cup (1 stick) melted unsalted butter
1 14 oz can pumpkin
1 egg
1/2 cup plain yogurt

Preheat oven to 375 degrees and prepare regular or mini-muffin cups by spraying with oil or lining with muffin papers.

In a large bowl, whisk together the dry ingredients. In another bowl, whisk together the wet ingredients. Pour wet mixture into dry mixture and fold together until just combined.

Fill muffin tins 3/4 full with batter. Bake for about 25 to 30 minutes for regular muffins (20 minutes for mini-muffins) or until muffins are puffed and turning golden brown on top. Serve warm if possible, or freeze once cool and warm in microwave just before serving.

Makes 14 regular or 28 mini-muffins

Friday, July 8, 2011

Whole Grain Chocolate Chip Cookies

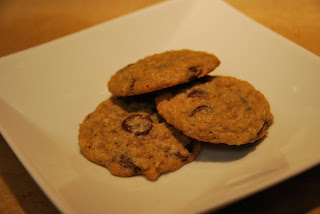
A few days ago I told you about the Oatmeal Flax Cookie recipe I found on the King Arthur Flour website, and hinted at another great recipe to come.  Well, I am so excited to share this one.  Many of my other cookie recipes are delicious but hearty and more healthy tasting...the type of cookie I happily serve as a snack, but might be self-conscious calling them dessert to a not-so-health-conscious audience.

This cookie, however, tastes like a delicious, home made chocolate chip cookie, no qualification or apology necessary.  But the secret is they are 100% whole grain, and have about half the sugar of some traditional chocolate chip cookie recipes I found, with no sacrifice in taste.  In fact, I think these are better because they are not so cloyingly sweet.  And the texture is great, slightly crisp around the edges, with plenty of soft chew, which is helped by the addition of the oats.  I cut the amount of chocolate chips in half from the original recipe and I think they are plenty chocolatey, but you could up the chips if you want.  Another great feature of these cookies is that they hold up really well:  they maintain their chewiness after a few days sitting on the counter and are amazing if frozen right away and warmed through in the microwave.

So I challenge you to try this recipe and still insist that whole grains don't belong in dessert baking.  Personally, I will enjoy the fact that I can have my treats and know that I am at least getting some health benefits even from dessert!

Refrigerated Dough*

Room Temperature Dough

Whole Grain Chocolate Chip Cookies
adapted from King Arthur Flour

1/2 cup (1 stick) butter
1/3 cup granulated sugar
1/3 cup packed brown sugar
1/2 teaspoon salt
1/4 teaspoon baking soda
1/2 teaspoon baking powder
1 teaspoon vanilla extract

1 large egg

3/4 cup white whole wheat flour
3/4 cup quick rolled oats, ground in a food processor or blender if you prefer a smoother texture

1 cup dark chocolate chips

Beat together first 7 ingredients using a hand or stand mixer (if you are doubling the recipe, I'd recommend the stand mixer if you have one).  Add the egg, beating until smooth, scraping down the sides as needed.  Add the flour and oats, mixing until combined, and finally mix in the chocolate chips.  

Refrigerate the dough for as long as you have the patience for, up to overnight.  The colder the dough, the less they will spread (*see note below).  Drop dough in 1 tablespoon balls on 2 lightly greased or parchment paper lined cookie sheets, allowing for spread (note if you only have 1 pan and are cycling multiple batches, the cookies will spread a lot more if the dough is placed on an already hot baking sheet).  Bake in 375 degree oven for 10-11 minutes for room temperature dough or up to 14 minutes if it's been thoroughly chilled, until cookies are just browning at the edges.

Let cookies cool completely on baking sheet, or if you want the sheet for another batch, give them at least a few minutes to set before transferring to a cooling rack.

Store completely cooled cookies in an airtight container at room temperature for up to a few days (if they last that long!), or freeze and reheat in the microwave.

Makes 27 cookies

* I'd only recommend bothering with the refrigeration if you really prefer a thicker cookie.  I tried these both ways (as you can see in the pictures) and the room temperature dough yielded a very nicely shaped cookie as well, not too thin at all.  In fact, we preferred the thinner cookies since the appeared bigger so it felt like a better deal :).  Plus, refrigerated dough is very difficult to scoop (think about trying to scoop solid butter), so another option would be to scoop the dough FIRST and then refrigerate if you have the room.  Or better yet, scoop your dough and freeze on a cookie sheet, then transfer frozen balls to a zip-top bag to have fresh baked cookies whenever you want, no scary chemicals from grocery dough needed!

Coconut Variation: Replace half of the butter with coconut oil, reduce the oats to 1/2 cup and add in 1/2 cup unsweetened shredded coconut.  YUM!!

Tuesday, July 5, 2011

Oatmeal Flax Cookies

A few weeks ago I had the pleasure of visiting the store and bakery at King Arthur Flour in Norwich, VT.  KAF is the maker of the Organic 100% White Whole Wheat Flour I love using for my pizza dough, hamburger buns, and every day bread.  White whole wheat flour is pretty amazing stuff - it allows us to make baked goods that are completely whole grain but still have the tenderness we've become accustomed to in years of eating white flour.  

While I have been an avid fan in breads, I have generally stuck to whole wheat pastry flour in muffins and cookies.  After my visit to the KAF store, however, I was perusing the extensive recipe catalog on their website and curious about whole grain cookies that use white whole wheat flour (KAF doesn't actually sell whole wheat pastry flour, so that could have something to do with their recipes as well!).  If you have not visited the website yet, you should definitely check it out - there are recipes for everything, well thought-out comments from reviewers, and if you have any questions, a live chat feature where you can get answers from expert bakers!

Getting back to the recipe at hand, while I am very happy with my Healthier Oatmeal Cookie recipe as a wholesome dessert treat, I haven't given up on the idea that maybe there's a better whole grain cookie out there.  I decided to try a few from the KAF website, starting with one for Oatmeal and Flax Cranberry cookies.  I often add flax meal into my Healthier Oatmeal Cookies, but really liked that the flax was actually built into this recipe.  I was also curious about how different a cookie would be when made with butter instead of oil.  And I think the answer is, when it comes to cookies, butter is better.  These cookies are more cohesive and richer.  The oats give them nice texture and the flax makes them really hearty, but the addition of dark chocolate chips push these over the edge to being decadent even without tons of sugar and with NO refined grains.  I'm starting to be ready to throw my all purpose flour away for good, but I have one more cookie recipe coming up soon that may be the clincher if you're not already convinced!


Oatmeal Flax Cookies
adapted from King Arthur Flour

1 cup (2 sticks) soft butter - I know, this sounds like a lot, but this recipe makes a lot of cookies!
3/4 cup brown sugar, lightly packed
2 teaspoons vanilla extract
1/2 teaspoon baking soda
1/2 teaspoon salt
1 large egg

1 1/2 cups King Arthur White Whole Wheat Flour
1 1/2 cups old-fashioned rolled oats
3/4 cup flax meal
1 1/2 cups dark chocolate chips (or dried fruit)
1/2 to 1 cup chopped nuts (optional)

In a large bowl, beat together the butter, brown sugar, vanilla, baking soda, salt, and egg until fluffy.  Mix in the flour, oats, flax meal, chocolate chips, and nuts (if using).

Let the dough rest for 30 minutes or so at room temperature, for the oats to soften. Towards the end of the rest period, preheat the oven to 350 and lightly grease two baking sheets, or line them with parchment paper.

Scoop the dough by tablespoonfuls onto the prepared baking sheets. Flatten each ball of dough slightly (cookies will not spread, so create whatever cookie shape you like - I recommend keeping them on the thick side!).

Bake the cookies for 10 minutes, until just brown around the edges. Cool them on the baking sheets for 10 minutes or so, to allow them to set. Move them to a cooling rack to finish cooling.

Makes not quite 4 dozen cookies.

Thursday, June 30, 2011

Veggie Bolognese

In my never-ending quest to find ways to eat more vegetables, I was inspired by a recent recipe posted on Weelicious for Veggie Bolognese Sauce.  What a great idea, making a chunky tomato sauce which includes multiple vegetables!  But rather than follow this recipe, I decided to adapt my recipe for basic Meat Sauce and just replace the meat portion with tons of veggies.  Carrots are a natural addition to a tomato sauce (and are already in my meat sauce anyway), and then while I was grocery shopping this weekend I saw some great looking organic zucchini and yellow squash as well.  The resulting sauce was absolutely delicious - flavorful, sweet, and a little crunchy.  I loved the combination of flavors, but feel free to make your own combination of veggies.

My first application was in Baked Ziti, since hubby has been asking me to make a veggie version for a while, and I highly recommend giving this a try (just throw in the entire recipe below as the sauce portion in the ziti recipe).  Unfortunately I forgot to take pictures of the sauce before mixing it into the ziti, but hopefully you get the idea!


Veggie Bolognese Sauce

2 tablespoons olive oil
1 medium onion
2 cups (approx 8 oz) carrots
1 medium zucchini
1 medium yellow squash

1 28-ounce can crushed tomatoes
1 6-ounce can tomato paste
1/2 teaspoon dried thyme
1 teaspoon salt

Heat the olive oil in a large, deep skillet.  Chop the onion, carrots, and squash by hand or in the food processor.  Add the veggies to the pan and cook for 5-10 minutes over medium-low heat, until onions are translucent and other veggies begin to soften.  Add the tomatoes, tomato paste, thyme, and salt.  Simmer uncovered over medium-low heat for 20 minutes, until veggies are soft to your liking and sauce has thickened.  Serve over your favorite whole wheat pasta.

Makes enough for 1 lb of pasta

Tuesday, June 28, 2011

Chocolate Muffins

If you've been following my posts about the baby naming we hosted for our little peanut, you'll know I found a new chocolate muffin recipe to try out on my guests.   These muffins really could pass for dessert, but I figured for a special event, having some decadent choices to go with all of the savory bagel accompaniments and other dishes I served wasn't a bad thing.  And as it turns out, these muffins are fairly equivalent nutrition-wise to my other muffins, but the addition of chocolate chips fooled everyone into thinking they were indulging while eating a whole grain muffin with not a ton of sugar.

My only complaint about this recipe is that the muffins turn out a little crumbly (even though they are also moist and rich!).  I had a few casualties that fell apart as I was taking them out of the muffin cups, but we sure did enjoy the scraps, and until I find a way to help these hold together a little better (suggestions welcome!!), I am thrilled to add a recipe to my muffin collection that satisfies a serious chocolate craving without any guilt!


Chocolate Muffins
adapted from Steph Chows

Dry Ingedients
3/4 cup whole wheat pastry flour
1/3 cup cocoa powder
1/3 cup granulated sugar
2 teaspoons baking powder
1 teaspoon baking soda
1/4 teaspoon salt

Wet Ingredients
1/2 cup unsweetened apple sauce
1/2 cup canola oil
1 egg
1 1/2 teaspoon vanilla extract

1/2 cup dark chocolate chips

Preheat the oven to 350, and grease a mini-muffin tin.

In a medium bowl, whisk together dry ingredients.  In a separate larger bowl, whisk together wet ingredients.  Add dry mixture to wet ingredients, stirring to combine, and then gently mix in chocolate chips.

Divide batter into 24 mini-muffin cups, and bake for about 16 minutes (20 minutes for standard muffins) until tops are firm to touch.  Let cool in tin before gently removing.

Makes 24 small mini-muffins

Monday, June 27, 2011

Asparagus and Zucchini Ribbon Salad

Last week I told you about the Mini Spinach and Cheddar Frittatas I made for the peanut's naming.  In addition to an egg dish, I wanted to include a light and summery salad.  I had a hard time thinking of what to do that wouldn't overlap with the veggies already present as a side for the bagels or in the Lentil Salad.  Until, that is, I remembered a recent post in Smitten Kitchen for an asparagus ribbon salad.  I thought this was such a cool idea - just eating raw ribbons of asparagus.  After a little more digging, I found a similar Giada De Laurentiis recipe that combined zucchini ribbons with small asparagus pieces, also in a lemon dressing, and decided to combine the two concepts.  After being told by several people that I was crazy to make a salad for 35 people that required shredding the veggies with a peeler, I bit the bullet and allotted a decent amount of time for prep of this salad the day before the party.  I am happy to report that not only did it take way less time than I expected to make my ribbons, but the ribbons also held up beautifully in zip-top bags in my fridge (without dressing!) overnight.

On the day of the party, this salad just kept disappearing!  Despite some skeptical looks when I told guests the asparagus was raw, overall I got rave reviews, including comments from people who generally don't like asparagus telling me they loved this salad.  My serving bowl wasn't quite big enough for the amount that I prepared, and we had to refill the bowl several times as people came back for seconds...and thirds :).  I hope you'll keep this in mind as a yummy side dish for your family or as a unique dish to serve to company!


Asparagus and Zucchini Ribbon Salad
adapted from Food Network and Smitten Kitchen


2 zucchini
1 bunch asparagus

1/4 cup extra-virgin olive oil
2 tablespoons lemon juice
1/2 teaspoon salt
1/4 teaspoon freshly ground black pepper

1-2 ounces Pecorino Romano or Parmesan cheese

Trim the ends off of the zucchini and then use a vegetable peeler to create long strips.  Next, lay each asparagus spear flat on a cutting board and, holding the woody end, use the vegetable peeler to make long strips from the base to tip (I found this easiest with a "Y" shaped peeler).  Discard the woody ends when you're done.  Use your peeler to create shavings of the cheese as well.

In a small bowl, combine the olive oil, lemon juice, salt, and pepper. 

Create the salad by layering veggies and cheese and gently tossing with some dressing about 1/3 at a time.  Serve immediately or up to 2 hours after dressing.

Do ahead: Prepare the veggie and cheese strips and store in zip-top bags overnight, mixing up the dressing and storing in a separate container.  Toss up to 2 hours before serving and add cheese at the last minute.

Tuesday, June 14, 2011

Mini Spinach and Cheddar Frittatas

As I mentioned in my post about the naming ceremony we recently hosted for the peanut, I decided to plan a menu that mixed traditional bagels with some homemade sides that helped round out the meal.  I was serving lox (smoked salmon) with the bagels, but for people who may not be a fan, I thought it would be nice to have another protein selection.  I love egg dishes, but thought it would be difficult to make enough quiches or frittatas for 35 people.  While doing some recipe searching, however, I found this recipe for Crustless Spinach Quiche which had tons of suggestions in the comments to make it in muffin tins instead of a pie plate.  I thought that sounded perfect!  When testing the recipe, I made some other changes suggested by reviewers (more egg, less cheese, less spinach, add milk) and also decided that this really isn't quiche since it has no cream and a very different consistency.  And so mini frittatas were born.  I served these to two separate groups - the friends I tested them on last week, and my family at the naming, and got tons of rave reviews.  On top of being delicious, they were also so fun to serve and eat, and even reheated well the next day (or were yummy straight from the fridge!).

I quadrupled this recipe for my crowd and borrowed muffin tins from my mom so I could make all 48 at one time.  But if you are making this for a crowd and don't have multiple muffin tins or enough oven space, they were delicious at room temperature, so feel free to make them one batch at a time.  I also prepped the egg mixture and the spinach/onion mixture the day before and mixed up all of the ingredients right before baking, which saved me a good amount of time and didn't seem to impact the final result at all.

As a side note, you could definitely play with this recipe if you want - I think it would be great with broccoli, or different kinds of cheeses, using the proportions here as a base.  Please let me know if you find any variations that are especially yummy - I have a feeling I'll be returning to this recipe time and time again!


Mini Spinach and Cheddar Frittatas
adapted from All Recipes

1 tablespoon vegetable oil
1 onion, finely chopped
8-10 ounces frozen chopped spinach, thawed and drained well
6 eggs
1/2 cup milk
2 cups shredded cheddar cheese (or any cheese you prefer)
1/2 teaspoon salt
1/8 teaspoon ground black pepper

Preheat oven to 350. Grease a standard 12-cup muffin tin.

Heat oil in a large skillet over medium heat. Add onions and cook, stirring occasionally, until onions are soft and just starting to carmelize.  If you're not sure your spinach is well drained, you can add it to the pan for a few minutes with the onions to get rid of any extra water.

Meanwhile, in a large bowl, whisk together eggs and milk.  Add cheese, salt and pepper, spinach, and onion. Distribute mixture evenly into 12 standard muffin cups.  Bake until eggs have set and sides are light brown, about 20-25 minutes.  Let cool for 5-10 minutes and gently remove from muffin tin before serving.

Makes 12 mini-fritattas

Baby Naming for the Peanut

Last weekend, we hosted a naming ceremony for our little peanut at our home.  Traditionally, Jewish events like this require a spread of bagels, cream cheese, lox, tuna, and various other cheese, fish, and veggie sides for the bagels.  Sometimes there are also knishes, or noodle kugel, but the basics are the same and catered from the local bagel shop or deli.  I was all ready to serve this menu to my guests, but somehow it didn't feel right.  First, when you really take a look, it's not a well balanced menu - where are the veggies?  And who decided it's a good idea to serve a potato or pasta dish as a side to enormous bagels - can anyone say carb overload?  Also, as a person who loves to cook (and writes a blog about how important cooking is!), buying all pre-made food for such an important event seemed wrong.  And my final reservation was that while I love bagels, I actually don't really like most of the traditional accompaniments.  Yes, I'm admitting on the internet that I'm a Jew who doesn't like cream cheese, lox, tuna, whitefish salad, etc.  Not that I need to like every food I serve to guests, but I just thought I could do better!

So after gaining assurance from my mom, hubby, and friends that I wasn't completely insane for making food for my 35 guests while taking care of a toddler and 3 month old, I came up with a menu.  My mom insisted that if I was inviting guests to a Jewish event on a Saturday at noon, they were going to expect bagels, and I certainly didn't want to disappoint!  So I decided to get bagels with some of the fixings, but make a few extra dishes to round out the meal.  The theme was small, individual portions so that guests could easily take a little of everything without having an obscene amount of food on their plates.  With that in mind, after much deliberation and recipe searching, the final menu is below.  Some of my old standby recipes made a comeback, along with a handful of new ones that turned out to get rave reviews!  In the end, I'm so glad I was able to put my personal touch on the food served on this very special day in my baby girl's life, and was rewarded with enough compliments on the food to make all of my work worthwhile :).


Lunch


Dessert


*New recipes - links will be added as I post these! 

Friday, June 10, 2011

Simple Falafel

Falafel is not something I grew up eating, but at some point a few years back, hubby must have decided to order some and I discovered how delicious it is.  I have had it a few times since, but it never occurred to me to make it at home.  That is, until I signed the munchkin up for a cooking class this spring which had a different country theme each week.  When it came time to learn about Israel, the food of the week was falafel, served with hummus and pita bread.  The recipe had to be easy and quick in order for 2 year olds to be able to make and eat it within the 45 minute class time, and the result was delicious!  Well, the munchkin really was only interested in the pita bread, but I didn't mind finishing off her portion :).  When I got home I did a quick internet search and found a recipe that sounded just like what we made in class.

I ended up making a few changes.  The biggest was that I'm really not up for deep frying at home, so I pan fried my falafels instead.  I also left out the garlic and used dried parsley instead of fresh.  Happily, my home version was just as good as the ones from class.  The only problem is it's a little tricky to keep them from falling apart when not deep frying, but I'm totally willing to overlook that for a healthy non-meat based meal!


Simple Falafel
adapted from mideastfood.about.com


1 15 oz. can chickpeas, drained and rinsed
1 medium onion, cut into chunks
2 teaspoons dried parsley
1 teaspoon coriander
3/4 teaspoon cumin
1/2 teaspoon salt
2 tablespoons flour
oil for frying (canola or vegetable)

Combine all ingredients (except oil) in a food processor to create a thick paste.  Preheat a large (non-stick) pan over medium heat.  Add enough oil to just barely cover the bottom of the pan.  When the oil is hot, drop 2 tablespoon balls of the mixture into the pan and flatten slightly (I did this with a large cookie scoop).  Don't overcrowd the pan.  Gently flip when the first side is brown and crispy, approximately 5 minutes, and cook another 5 minutes on the other side.  Repeat additional batches with remaining mixture as needed.

Serve with pita, hummus, salad, yogurt/lemon/tahini sauce, or eat on their own.

Makes approximately 20 falafel patties.

Thursday, May 19, 2011

100% Whole Wheat Hamburger Buns (Bread Machine)

Have you looked at the ingredient lists on hamburger buns inthe grocery store lately?  Even "wheat" buns are not entirely whole grain and include things like calcium proprionate and monocalcium phosphate - anyone have any idea what these are?  The options at stores like Whole Foods and Trader Joe's are a little better, but finding an organic bun with a reasonable ingredient list is a bit like playing the lotto.  So after a lot of frustration and avoiding hamburgers because I was unhappy with the bun options, I decided to try making my own!  I had come across a recipe on the King Arthur Flour website for 100% Whole Wheat Hotdog Buns, and figured the recipe should be able to be adapted for bread machine use and hamburgers.  I took advantage of the live chat feature on that website to get some advice from KAF's bakers, and gave them a try.  It took 2 tries to get it right, but wow, are these buns ever tasty!  I was so impressed...they are soft and flavorful but held up well to some thick hamburgers and turkey burgers.

I can already hear you saying that it seems crazy to make something like hamburger buns, but it is so worth it.  Elapsed time for this recipe is about 4 hours, but active time in all that is closer to 30 minutes.  Plus, the batch makes 12-16 and they freeze well, so for a family of 4 you could make this once and have them last for 3-4 meals - 10 minutes or less of effort to have homemade, high quality buns is totally reasonable!  This recipe would also be great for a dinner roll or hot dog bun - see the notes at the bottom of the recipe for a little more info.  I hope you'll give these a try!


100% Whole Wheat Hamburger* Buns
adapted from King Arthur Flour

1 1/2 cups water
1 large egg

3 1/2 cups white whole wheat flour
1/4 cup dry milk
3 tablespoons potato flour or 1/3 cup dried potato flakes
2 tablespoons sugar
1 1/4 teaspoons salt
1 tablespoon vital wheat gluten
2 1/4 teaspoons instant yeast

2 tablespoons (1 ounce) butter


Add all of the ingredients to the pan of your bread machine** and set for basic dough cycle.

Turn the dough out onto a lightly greased or floured work surface.  Pat into a symetrical shape, adding a sprinkle of flour if dough is really sticky (don't overdo it on the flour here as the stickiness will help in shaping the buns).  Using a pastry scraper or large sharp knife, cut dough into 12 even pieces for large buns, or 16 for smaller, buns.  Shape each hamburger bun by patting the piece of dough into a flat disk about 3/4 inches thick and pinching the edges into the center to form a round shape (for great pictures of what I mean here, check out Itty Bitty Bistro).

Here you have 2 options, depending on how big you want your buns.  For 12 thick buns, them into a lightly greased 9x13 baking dish after shaping.  For 16 smaller (and lighter) buns, place them on a parchment or silpat lined half sheet pan.  I have found the smaller buns are plenty big for a 1/4 pound burger.

Cover the shaped buns with a lightly greased piece of plastic wrap and let rise for another 1 1/2 hours.

Preheat your oven to 375°F with enough time to heat up before the end of the  rising time (I set a timer for 1 hour, turned on my oven, and then set the timer for another 30 minutes).  Remove the plastic wrap and bake for 20-25 minutes, until golden brown.  Remove from the pan and let cool completely on a rack before breaking apart into separate buns.

Serve that day or store in a zip top bag in the freezer until needed, defrosting for a couple of hours on the counter top or in the microwave.  They are also great as a general purpose sandwich roll, or warmed in the microwave with a little butter (or your favorite topping) as a snack.

Makes 12-16 burger buns

* This recipe would also be great for dinner rolls (just make them a little smaller - probably 20 would be a good amount - and use the 9 x 13 dish so they don't spread out too much), or hot dog buns (see Itty Bitty Bistro for how to roll hot dog buns, too!)

** For non-bread machine instructions, see the original instructions on the King Arthur website

Wednesday, April 20, 2011

Flourless Chocolate Cake

Passover is often filled with yucky foods made with matzo meal that do a terrible job of imitating real food.  I have found that dessert are especially tough, as many people try to modify regular recipes to be kosher for Passover, but the result is never going to be quite the same.  My opinion is that there are plenty of sweets out there that don't require flour to begin with, and these should be the food we focus on during the holiday.  For example, I have a recipe for coconut macaroons that I happily make all year round (fyi, I like these better without the chocolate coating).  Another obvious choice for Passover is flourless chocolate cake - the name says it all! 

Well, as it turns out, Deb at Smitten Kitchen has the same issue with Passover desserts as I do, and a couple of years ago published 17 ideas for things to make that actually taste good!  She recommended a flourless chocolate cake recipe by David Lebovitz which is called "Chocolate Idiot Cake", because it's apparently so easy only an idiot could screw it up.  I took on the challenge and prayed that I didn't turn out to be that idiot!  The ingredient list is as easy as it gets - chocolate, butter, sugar, and eggs.  I figured there wasn't much risk because no matter what you do, how could that combination possibly taste bad?

As it turns out, I might not be as smart as I thought!  I first tried this recipe last year (and in fact am updating the post I intended to share at that time) with so-so results.  The cake was delicious - it really can't be anything else, but I couldn't quite get it to set up as promised in the instructions.  David Lebovitz says that when the cake is done, your finger will come away clean when you gently touch the center.  No such luck.  I thought I just didn't bake it long enough and ran out of time to experiment by keeping it in the oven, but when I reread the recipe in preparation for posting I realized I made a big mistake - the recipe calls for 7 ounces of butter, and I used 7 tablespoons, which is half that amount!  Ok, so maybe I'm an idiot after all, but who writes recipes in ounces of butter??

This year, determined to correct the mistake, I dug up the recipe and tried again, this time following every detail to the letter.  And guess what - my finger still had a blob of chocolate on it when I touched it after 1 hour 15 minutes!  I left it in for another 15 minutes and still had some yummy chocolate to lick off my finger, so under the assumption that the eggs had to be cooked after 90 minutes in the oven, I took it out.

The next day when we cut into the cake after being refrigerated overnight, it was definitely cooked through and delicious!  It is the true chocolate lover's dream - unbelievably rich, moist and smooth, with that super-intense dark chocolate taste that almost has a hint of coffee or a burned undertone (anyone know what I'm talking about here?).  It's the kind of dessert that benefits from a hot beverage to help wash it down, and you can't eat more than a small piece in a sitting.  Ok, well I can, but if I do I tend to regret it afterwards! 

In hindsight, I'm thinking it was probably done in an hour 15 minutes, but the extra 15 minutes didn't hurt it, so I've put 90 minutes in the recipe below.  Feel free to take it out early and let me know how it goes!  I've also eliminated that silly part about the clean finger and next time will just trust the clock to avoid fingerprints on my beautiful cake :)


Flourless Chocolate Cake
adapted from DavidLebovitz.com

10 ounces good quality bittersweet or semisweet chocolate, coarsely chopped (I used E. Guittard 72%)
7 ounces (14 tablespoons or 1 3/4 sticks) butter, salted or unsalted, cut into pieces
5 large eggs, at room temperature
1 cup sugar

Preheat the oven to 350.  Butter a 9-inch springform pan and dust it with cocoa powder, tapping out any excess. Wrap the outside tightly with heavy duty aluminum foil to make sure no water will seep in during baking.

Melt the chocolate and butter in a double boiler (take any heat-proof bowl and set it on top of a pot with about 2 inches of barely simmering water), stirring occasionally, until smooth. Remove from heat. (You can also do this step in the microwave but I find the double boiler method easier!)

In a large bowl, whisk together the eggs and sugar, then whisk in the melted chocolate mixture until smooth.

Pour the batter into the prepared springform pan and cover the top of the pan snugly with a sheet of foil. Put the springform pan into a larger baking pan, such as a roasting pan, and add enough hot water to the baking pan to come about halfway up to the outside of the cake pan.

Bake for 1 hour and 30 minutes.  The cake will still be jiggly in the center but should set up nicely once cool.  Lift the cake pan from the water bath and remove the foil. Let cake cool completely on a cooling rack.

Store, covered, in  the refrigerator for 3-5 days.  Serve at room temperature with whipped cream, ice cream, or just a cup of tea.

Serves at least 16.

Charoset, kid friendly and nut free!

Those of you who celebrate Passover know that the holiday has its benefits (matzo ball soup!) and drawbacks (how long has this seder been dragging on??).  On the plus side for me is definitely charoset - this sweet apple and walnut mixture comes near the end of the seder, and marks the beginning of the yummy dinner portion.  It must have some magic powers, because it even manages to make the plain matzo taste good!  This year I was in charge of making the charoset for a seder at my mom's house.  I immediately went to this recipe which I've made in the past with much success before I realized that 1) wine as an uncooked ingredient probably wasn't the best idea for the 3 kids under 6 at the table, and 2) my niece is allergic to nuts and therefore it was potentially dangerous to have walnuts floating around!  That led me to do a little searching, and I found this recipe for nut-free charoset, basically using pumpkin seeds as a substitute for the walnuts.  I thought that was a good idea, but then I heard a rumor that my brother really likes sunflower seeds, so I decided their nutty taste would work well, too!  I also still liked the proportions from my original epicurious recipe, so the result was a combination of a few ideas along with some improv.

FYI, the recipe as written below makes a TON of charoset - we used it for a seder for 12, another seder for 6, and still had a lot left over.  Feel free to half or quarter recipe as needed.  For those of you who don't celebrate Passover and/or have never had charoset, there is no reason why you couldn't make this as a snack for you or your kids any time - I know I have been enjoying the leftovers all week!


Charoset (kid friendly and nut free)

7 apples, peeled, cored, and cut into chunks
1 cup roasted unsalted sunflower seeds*
1 cup grape juice (or sweet Passover wine if you're not serving to kids, e.g., Manishewitz Extra Heavy Malaga)
3 tablespoons brown sugar
1 tablespoon cinnamon

Place apples in food processor and pulse until chopped to your liking (you could chop by hand to get a more consistent texture, but I don't think it's necessary or worth the extra time!).  Dump into a large bowl, wipe out food processor, and add sunflower seeds.  Pulse just to chop a little bit (some whole seeds is fine) and add to apples.  Add the rest of the ingredients and mix well.  Taste and adjust any of the ingredients as you see fit.  Refrigerate until ready to use, up to a few days.  Charoset will taste better as it sits, so feel free to make ahead and plan for leftovers!

*I would use more next time; I went light because I was unsure how it would taste but would probably use closer to 1 1/2 cups

Friday, April 8, 2011

Basic 100% Whole Wheat Bread (Bread Machine)

As I talked about in great detail in my post about why I love my bread machine, over the last few months I have learned that it is entirely possible to feed my family homemade bread without tons of effort - all I needed was a little help from a cumbersome but very useful appliance!  I am committed to having our daily bread be 100% whole grain, and so far I've found 2 recipes that are really nice.  This one is a pretty basic whole wheat - definitely a more dense choice, but really nicely textured and is even good toasted after several days sitting around.  This has full approval from the munchkin, and all of the grown-ups in my life seem to love it!  Although recently I have actually been lightening the loaf a bit by replacing 1 cup of the whole wheat flour with white whole wheat flour, and have been very happy with the results.

Most bread machines have a specific order that you need to add the ingredients - mine calls for liquids, then dry ingredients, and yeast last, so that's how I've listed the ingredients here.  But please make sure you read the instructions for your specific machine!


Basic 100% Whole Wheat Bread
adapted from The Bread Lover's Bread Machine Cookbook

3/4 cup water
3/4 cup milk
1/4 cup agave or honey
2 tablespoons oil

4 cups whole wheat flour (or 3 cups whole wheat plus 1 cup white whole wheat flour)
3 tablespoons vital wheat gluten*
1 3/4 teaspoons salt

1 tablespoon SAF instant or rapid rise yeast** (or 1 tablespoon + 1/2 teaspoon bread machine yeast)

Add all ingredients to bread machine as directed for your model.  Set for whole wheat cycle (on my machine with SAF yeast I use quick wheat).  When bread is done, remove from pan immediately and allow to cool completely on a rack before slicing (if you can wait that long!).


* I'm not sure if this is available at regular grocery stores, but you can definitely find it at Whole Foods or other health food stores.

** I have only used SAF instant yeast for bread making, which allows me to use the "quick" cycle on my machine. This cuts the process down from close to 4 hours to a little more than 2, which is great! But bread machine yeast will also work if that's what you have or prefer.

Sunday, April 3, 2011

Why I Love My Bread Machine

I can't believe it's taken me this long to tell you all about my bread machine, and for that I apologize!  This is an appliance I never thought I'd buy until 2 things happened.  First, I read Barbara Kingsolver's Animal, Vegetable, Miracle (inspiration for my pizza obsession, too!).  As a quick summary, Kingsolver's family decided to spend a year eating only what they could grow themselves or procure locally.  So as you can probably guess, this family is hardcore in food preparation - growing during the warm months to can, freeze, and dry for the cold months, forgoing tropical fruit imported from across the world, the works!  So of course when she wrote about the homemade bread her husband made for the family, I wasn't surprised they they would go to those lengths.  Then I got to the sidebar written by her husband that was titled something like "how to impress your wife with a machine" - he was using a bread machine!!  Well, if a bread machine was hardcore enough for this family, who was I to judge??

The second thing that happened was that I got increasingly picky about bread that I would buy - I wanted something that was 100% whole grain, organic, didn't have tons of filler ingredients, and TASTED GOOD!  Apparently this was a virtually impossible request.  I could get 3 out of 4 criteria, but couldn't quite find everything.  I tried making bread by hand, and while it's certainly not as difficult as I might have expected, it's messy and I found I needed to get the timing exactly right so that I could be around for all of the steps, which meant it would sometimes be days before a bread actually got made.  So when we moved out of the city last summer and finally had a reasonably sized kitchen, my birthday request was for a bread machine.  And I am proud to tell you that I have not bought bread in months!  Along with my Zojirushi machine, I also bought a cookbook with tons of recipe ideas.  I have to confess I haven't branched out much past the 100% whole grain section (although I did make homemade white bread for my Thanksgiving stuffing), but my mom has made a bunch of other breads in the book that are equally delicious.

So here is my sales pitch (which, by the way, is totally unendorsed by anyone and 100% my own opinion expressed solely because I love my bread machine and this blog is the best place for me to go on rants about my views without having to see the eye rolling in person!). 
  • EASY - all that's required for most basic breads is to dump ingredients in the pan and turn on the machine.  Clean-up consists of throwing a few measuring cups/spoons in the dishwasher and, after the bread is done, washing a non-stick loaf pan and paddles, which barely require a sponge.  You do not need to do anything in the middle (for most recipes), or even be home except when it's time to take out the bread.  There's no watching the clock for rise times, transfering from bowl to bowl, kneading, or wondering.  Just dump, press start, and come back to fresh bread.
  • FAST - after a little practice, all ingredients can be in the machine in about 10 minutes, and then all you have to do is take the bread out when it's done.  On the quick cycle (which you can use as long as you have instant yeast), this means 2 hours 8 minutes on my machine and bread is done.  Most machines also have timer functions so that you can, for example, set up your ingredients in the evening and have the bread ready when you wake up.  And I already told you how easy clean-up is!
  • HEALTHY - you control the ingredients!
  • CHEAP - even with relatively expensive organic ingredients, the cost of a loaf is less than half of its closest equivalent in the store.  This helps to make up for the fact that the machine itself is NOT so cheap :)
  • DELICIOUS - you really can't beat the smell of fresh bread baking, and I have gotten rave reviews about my loaves, even though they are 100% whole grain.
The only downside I feel obligated to mention is that the baking pan is non-stick, and non-stick coatings have a questionable reputation regarding toxins and eco-consciousness.  This bothers me a little bit and I have been trying to minimize my use of non-stick pans in general, but at the same time if the alternative is buying store-bought bread (which is ALSO likely made in a non-stick pan), the benefits certainly outweigh the risks!  If this is concerning to you, one option would be to use the machine for making dough and transfer the bread to a glass pan and bake in your oven instead (since most reports say that it's heat which makes non-stick pans potentially dangerous).  But for me, until I can find the time to learn how to make bread by hand, I will happily continue to use my machine :)

Ok, now that I've told you about my new favorite kitchen appliance, it's time for some recipes.  The two breads I make the most are a basic whole wheat and a lighter version using all white whole wheat flour (the same flour I use in my pizza dough, another wonderful use for this machine!).  I'll post those separately so you can skip this whole rant when you want to refer back to the actual recipes :)

Update: Here is the listing of all of my bread machine recipes!