Friday, July 8, 2011

Whole Grain Chocolate Chip Cookies

A few days ago I told you about the Oatmeal Flax Cookie recipe I found on the King Arthur Flour website, and hinted at another great recipe to come.  Well, I am so excited to share this one.  Many of my other cookie recipes are delicious but hearty and more healthy tasting...the type of cookie I happily serve as a snack, but might be self-conscious calling them dessert to a not-so-health-conscious audience.

This cookie, however, tastes like a delicious, home made chocolate chip cookie, no qualification or apology necessary.  But the secret is they are 100% whole grain, and have about half the sugar of some traditional chocolate chip cookie recipes I found, with no sacrifice in taste.  In fact, I think these are better because they are not so cloyingly sweet.  And the texture is great, slightly crisp around the edges, with plenty of soft chew, which is helped by the addition of the oats.  I cut the amount of chocolate chips in half from the original recipe and I think they are plenty chocolatey, but you could up the chips if you want.  Another great feature of these cookies is that they hold up really well:  they maintain their chewiness after a few days sitting on the counter and are amazing if frozen right away and warmed through in the microwave.

So I challenge you to try this recipe and still insist that whole grains don't belong in dessert baking.  Personally, I will enjoy the fact that I can have my treats and know that I am at least getting some health benefits even from dessert!

Refrigerated Dough*
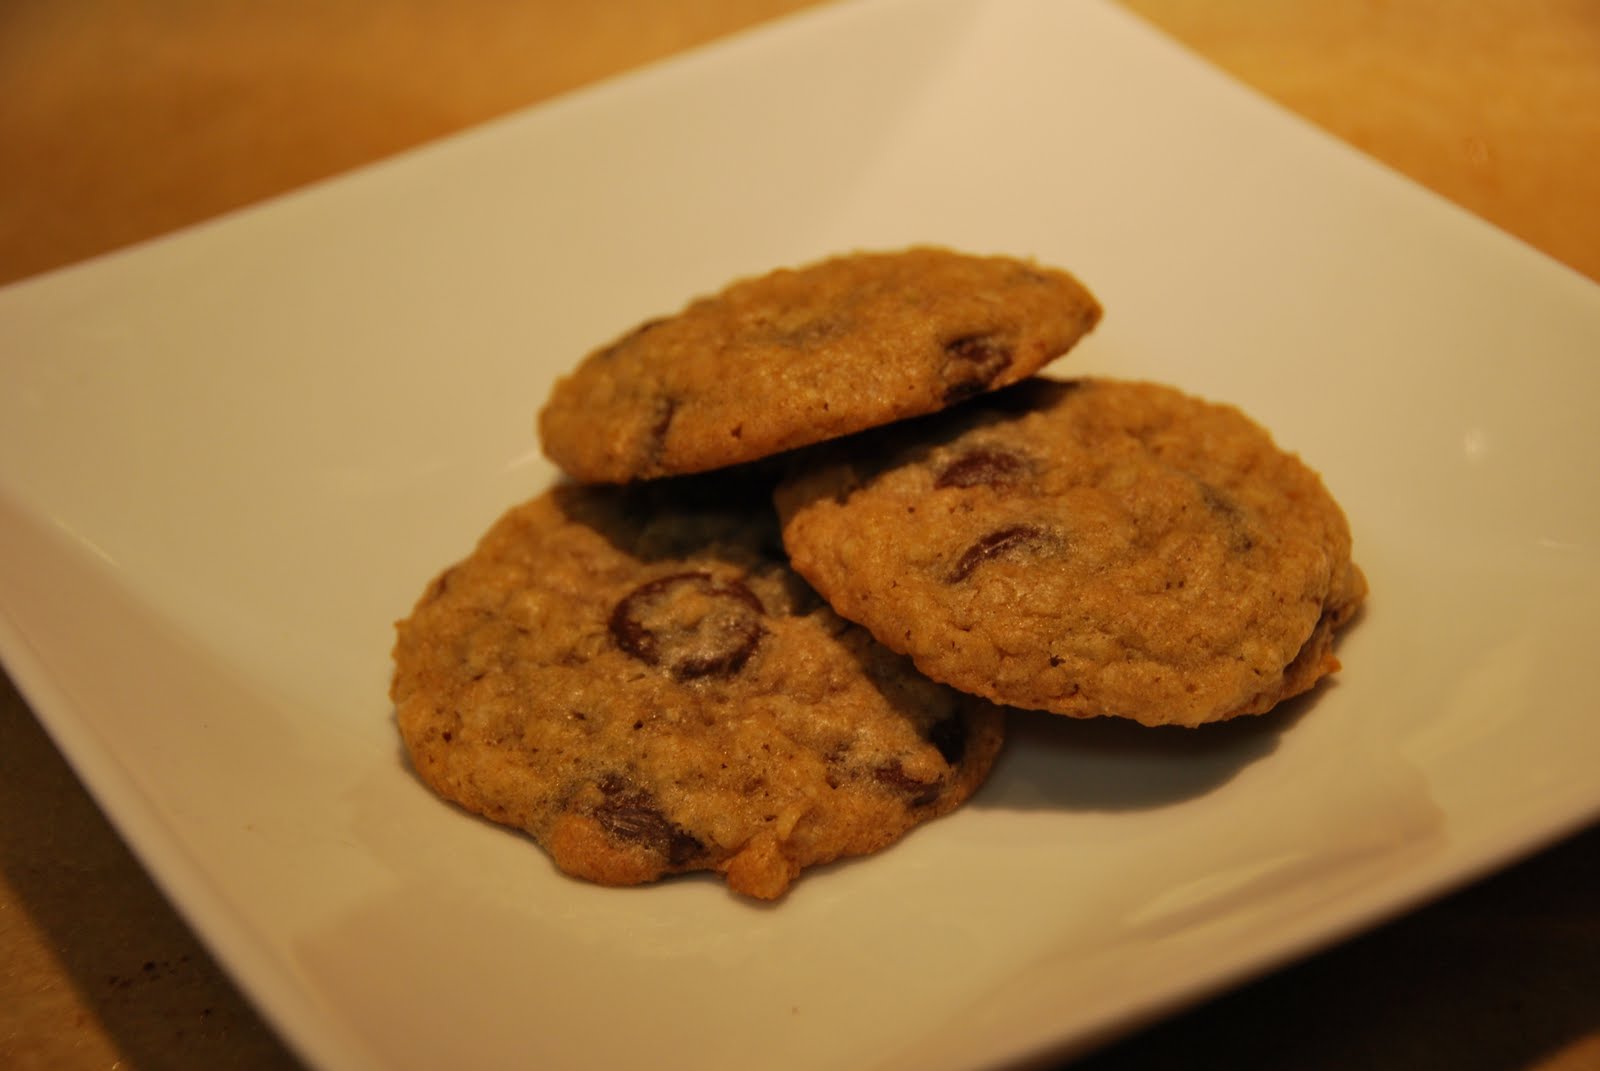
Room Temperature Dough

Whole Grain Chocolate Chip Cookies
adapted from King Arthur Flour

1/2 cup (1 stick) butter
1/3 cup granulated sugar
1/3 cup packed brown sugar
1/2 teaspoon salt
1/4 teaspoon baking soda
1/2 teaspoon baking powder
1 teaspoon vanilla extract

1 large egg

3/4 cup white whole wheat flour
3/4 cup quick rolled oats, ground in a food processor or blender if you prefer a smoother texture

1 cup dark chocolate chips

Beat together first 7 ingredients using a hand or stand mixer (if you are doubling the recipe, I'd recommend the stand mixer if you have one).  Add the egg, beating until smooth, scraping down the sides as needed.  Add the flour and oats, mixing until combined, and finally mix in the chocolate chips.  

Refrigerate the dough for as long as you have the patience for, up to overnight.  The colder the dough, the less they will spread (*see note below).  Drop dough in 1 tablespoon balls on 2 lightly greased or parchment paper lined cookie sheets, allowing for spread (note if you only have 1 pan and are cycling multiple batches, the cookies will spread a lot more if the dough is placed on an already hot baking sheet).  Bake in 375 degree oven for 10-11 minutes for room temperature dough or up to 14 minutes if it's been thoroughly chilled, until cookies are just browning at the edges.

Let cookies cool completely on baking sheet, or if you want the sheet for another batch, give them at least a few minutes to set before transferring to a cooling rack.

Store completely cooled cookies in an airtight container at room temperature for up to a few days (if they last that long!), or freeze and reheat in the microwave.

Makes 27 cookies

* I'd only recommend bothering with the refrigeration if you really prefer a thicker cookie.  I tried these both ways (as you can see in the pictures) and the room temperature dough yielded a very nicely shaped cookie as well, not too thin at all.  In fact, we preferred the thinner cookies since the appeared bigger so it felt like a better deal :).  Plus, refrigerated dough is very difficult to scoop (think about trying to scoop solid butter), so another option would be to scoop the dough FIRST and then refrigerate if you have the room.  Or better yet, scoop your dough and freeze on a cookie sheet, then transfer frozen balls to a zip-top bag to have fresh baked cookies whenever you want, no scary chemicals from grocery dough needed!

Coconut Variation: Replace half of the butter with coconut oil, reduce the oats to 1/2 cup and add in 1/2 cup unsweetened shredded coconut.  YUM!!

Tuesday, July 5, 2011

Oatmeal Flax Cookies

A few weeks ago I had the pleasure of visiting the store and bakery at King Arthur Flour in Norwich, VT.  KAF is the maker of the Organic 100% White Whole Wheat Flour I love using for my pizza dough, hamburger buns, and every day bread.  White whole wheat flour is pretty amazing stuff - it allows us to make baked goods that are completely whole grain but still have the tenderness we've become accustomed to in years of eating white flour.  

While I have been an avid fan in breads, I have generally stuck to whole wheat pastry flour in muffins and cookies.  After my visit to the KAF store, however, I was perusing the extensive recipe catalog on their website and curious about whole grain cookies that use white whole wheat flour (KAF doesn't actually sell whole wheat pastry flour, so that could have something to do with their recipes as well!).  If you have not visited the website yet, you should definitely check it out - there are recipes for everything, well thought-out comments from reviewers, and if you have any questions, a live chat feature where you can get answers from expert bakers!

Getting back to the recipe at hand, while I am very happy with my Healthier Oatmeal Cookie recipe as a wholesome dessert treat, I haven't given up on the idea that maybe there's a better whole grain cookie out there.  I decided to try a few from the KAF website, starting with one for Oatmeal and Flax Cranberry cookies.  I often add flax meal into my Healthier Oatmeal Cookies, but really liked that the flax was actually built into this recipe.  I was also curious about how different a cookie would be when made with butter instead of oil.  And I think the answer is, when it comes to cookies, butter is better.  These cookies are more cohesive and richer.  The oats give them nice texture and the flax makes them really hearty, but the addition of dark chocolate chips push these over the edge to being decadent even without tons of sugar and with NO refined grains.  I'm starting to be ready to throw my all purpose flour away for good, but I have one more cookie recipe coming up soon that may be the clincher if you're not already convinced!


Oatmeal Flax Cookies
adapted from King Arthur Flour

1 cup (2 sticks) soft butter - I know, this sounds like a lot, but this recipe makes a lot of cookies!
3/4 cup brown sugar, lightly packed
2 teaspoons vanilla extract
1/2 teaspoon baking soda
1/2 teaspoon salt
1 large egg

1 1/2 cups King Arthur White Whole Wheat Flour
1 1/2 cups old-fashioned rolled oats
3/4 cup flax meal
1 1/2 cups dark chocolate chips (or dried fruit)
1/2 to 1 cup chopped nuts (optional)

In a large bowl, beat together the butter, brown sugar, vanilla, baking soda, salt, and egg until fluffy.  Mix in the flour, oats, flax meal, chocolate chips, and nuts (if using).

Let the dough rest for 30 minutes or so at room temperature, for the oats to soften. Towards the end of the rest period, preheat the oven to 350 and lightly grease two baking sheets, or line them with parchment paper.

Scoop the dough by tablespoonfuls onto the prepared baking sheets. Flatten each ball of dough slightly (cookies will not spread, so create whatever cookie shape you like - I recommend keeping them on the thick side!).

Bake the cookies for 10 minutes, until just brown around the edges. Cool them on the baking sheets for 10 minutes or so, to allow them to set. Move them to a cooling rack to finish cooling.

Makes not quite 4 dozen cookies.

Thursday, June 30, 2011

Veggie Bolognese

In my never-ending quest to find ways to eat more vegetables, I was inspired by a recent recipe posted on Weelicious for Veggie Bolognese Sauce.  What a great idea, making a chunky tomato sauce which includes multiple vegetables!  But rather than follow this recipe, I decided to adapt my recipe for basic Meat Sauce and just replace the meat portion with tons of veggies.  Carrots are a natural addition to a tomato sauce (and are already in my meat sauce anyway), and then while I was grocery shopping this weekend I saw some great looking organic zucchini and yellow squash as well.  The resulting sauce was absolutely delicious - flavorful, sweet, and a little crunchy.  I loved the combination of flavors, but feel free to make your own combination of veggies.

My first application was in Baked Ziti, since hubby has been asking me to make a veggie version for a while, and I highly recommend giving this a try (just throw in the entire recipe below as the sauce portion in the ziti recipe).  Unfortunately I forgot to take pictures of the sauce before mixing it into the ziti, but hopefully you get the idea!


Veggie Bolognese Sauce

2 tablespoons olive oil
1 medium onion
2 cups (approx 8 oz) carrots
1 medium zucchini
1 medium yellow squash

1 28-ounce can crushed tomatoes
1 6-ounce can tomato paste
1/2 teaspoon dried thyme
1 teaspoon salt

Heat the olive oil in a large, deep skillet.  Chop the onion, carrots, and squash by hand or in the food processor.  Add the veggies to the pan and cook for 5-10 minutes over medium-low heat, until onions are translucent and other veggies begin to soften.  Add the tomatoes, tomato paste, thyme, and salt.  Simmer uncovered over medium-low heat for 20 minutes, until veggies are soft to your liking and sauce has thickened.  Serve over your favorite whole wheat pasta.

Makes enough for 1 lb of pasta

Tuesday, June 28, 2011

Chocolate Muffins

If you've been following my posts about the baby naming we hosted for our little peanut, you'll know I found a new chocolate muffin recipe to try out on my guests.   These muffins really could pass for dessert, but I figured for a special event, having some decadent choices to go with all of the savory bagel accompaniments and other dishes I served wasn't a bad thing.  And as it turns out, these muffins are fairly equivalent nutrition-wise to my other muffins, but the addition of chocolate chips fooled everyone into thinking they were indulging while eating a whole grain muffin with not a ton of sugar.

My only complaint about this recipe is that the muffins turn out a little crumbly (even though they are also moist and rich!).  I had a few casualties that fell apart as I was taking them out of the muffin cups, but we sure did enjoy the scraps, and until I find a way to help these hold together a little better (suggestions welcome!!), I am thrilled to add a recipe to my muffin collection that satisfies a serious chocolate craving without any guilt!


Chocolate Muffins
adapted from Steph Chows

Dry Ingedients
3/4 cup whole wheat pastry flour
1/3 cup cocoa powder
1/3 cup granulated sugar
2 teaspoons baking powder
1 teaspoon baking soda
1/4 teaspoon salt

Wet Ingredients
1/2 cup unsweetened apple sauce
1/2 cup canola oil
1 egg
1 1/2 teaspoon vanilla extract

1/2 cup dark chocolate chips

Preheat the oven to 350, and grease a mini-muffin tin.

In a medium bowl, whisk together dry ingredients.  In a separate larger bowl, whisk together wet ingredients.  Add dry mixture to wet ingredients, stirring to combine, and then gently mix in chocolate chips.

Divide batter into 24 mini-muffin cups, and bake for about 16 minutes (20 minutes for standard muffins) until tops are firm to touch.  Let cool in tin before gently removing.

Makes 24 small mini-muffins

Monday, June 27, 2011

Asparagus and Zucchini Ribbon Salad

Last week I told you about the Mini Spinach and Cheddar Frittatas I made for the peanut's naming.  In addition to an egg dish, I wanted to include a light and summery salad.  I had a hard time thinking of what to do that wouldn't overlap with the veggies already present as a side for the bagels or in the Lentil Salad.  Until, that is, I remembered a recent post in Smitten Kitchen for an asparagus ribbon salad.  I thought this was such a cool idea - just eating raw ribbons of asparagus.  After a little more digging, I found a similar Giada De Laurentiis recipe that combined zucchini ribbons with small asparagus pieces, also in a lemon dressing, and decided to combine the two concepts.  After being told by several people that I was crazy to make a salad for 35 people that required shredding the veggies with a peeler, I bit the bullet and allotted a decent amount of time for prep of this salad the day before the party.  I am happy to report that not only did it take way less time than I expected to make my ribbons, but the ribbons also held up beautifully in zip-top bags in my fridge (without dressing!) overnight.

On the day of the party, this salad just kept disappearing!  Despite some skeptical looks when I told guests the asparagus was raw, overall I got rave reviews, including comments from people who generally don't like asparagus telling me they loved this salad.  My serving bowl wasn't quite big enough for the amount that I prepared, and we had to refill the bowl several times as people came back for seconds...and thirds :).  I hope you'll keep this in mind as a yummy side dish for your family or as a unique dish to serve to company!


Asparagus and Zucchini Ribbon Salad
adapted from Food Network and Smitten Kitchen


2 zucchini
1 bunch asparagus

1/4 cup extra-virgin olive oil
2 tablespoons lemon juice
1/2 teaspoon salt
1/4 teaspoon freshly ground black pepper

1-2 ounces Pecorino Romano or Parmesan cheese

Trim the ends off of the zucchini and then use a vegetable peeler to create long strips.  Next, lay each asparagus spear flat on a cutting board and, holding the woody end, use the vegetable peeler to make long strips from the base to tip (I found this easiest with a "Y" shaped peeler).  Discard the woody ends when you're done.  Use your peeler to create shavings of the cheese as well.

In a small bowl, combine the olive oil, lemon juice, salt, and pepper. 

Create the salad by layering veggies and cheese and gently tossing with some dressing about 1/3 at a time.  Serve immediately or up to 2 hours after dressing.

Do ahead: Prepare the veggie and cheese strips and store in zip-top bags overnight, mixing up the dressing and storing in a separate container.  Toss up to 2 hours before serving and add cheese at the last minute.

Tuesday, June 14, 2011

Mini Spinach and Cheddar Frittatas

As I mentioned in my post about the naming ceremony we recently hosted for the peanut, I decided to plan a menu that mixed traditional bagels with some homemade sides that helped round out the meal.  I was serving lox (smoked salmon) with the bagels, but for people who may not be a fan, I thought it would be nice to have another protein selection.  I love egg dishes, but thought it would be difficult to make enough quiches or frittatas for 35 people.  While doing some recipe searching, however, I found this recipe for Crustless Spinach Quiche which had tons of suggestions in the comments to make it in muffin tins instead of a pie plate.  I thought that sounded perfect!  When testing the recipe, I made some other changes suggested by reviewers (more egg, less cheese, less spinach, add milk) and also decided that this really isn't quiche since it has no cream and a very different consistency.  And so mini frittatas were born.  I served these to two separate groups - the friends I tested them on last week, and my family at the naming, and got tons of rave reviews.  On top of being delicious, they were also so fun to serve and eat, and even reheated well the next day (or were yummy straight from the fridge!).

I quadrupled this recipe for my crowd and borrowed muffin tins from my mom so I could make all 48 at one time.  But if you are making this for a crowd and don't have multiple muffin tins or enough oven space, they were delicious at room temperature, so feel free to make them one batch at a time.  I also prepped the egg mixture and the spinach/onion mixture the day before and mixed up all of the ingredients right before baking, which saved me a good amount of time and didn't seem to impact the final result at all.

As a side note, you could definitely play with this recipe if you want - I think it would be great with broccoli, or different kinds of cheeses, using the proportions here as a base.  Please let me know if you find any variations that are especially yummy - I have a feeling I'll be returning to this recipe time and time again!


Mini Spinach and Cheddar Frittatas
adapted from All Recipes

1 tablespoon vegetable oil
1 onion, finely chopped
8-10 ounces frozen chopped spinach, thawed and drained well
6 eggs
1/2 cup milk
2 cups shredded cheddar cheese (or any cheese you prefer)
1/2 teaspoon salt
1/8 teaspoon ground black pepper

Preheat oven to 350. Grease a standard 12-cup muffin tin.

Heat oil in a large skillet over medium heat. Add onions and cook, stirring occasionally, until onions are soft and just starting to carmelize.  If you're not sure your spinach is well drained, you can add it to the pan for a few minutes with the onions to get rid of any extra water.

Meanwhile, in a large bowl, whisk together eggs and milk.  Add cheese, salt and pepper, spinach, and onion. Distribute mixture evenly into 12 standard muffin cups.  Bake until eggs have set and sides are light brown, about 20-25 minutes.  Let cool for 5-10 minutes and gently remove from muffin tin before serving.

Makes 12 mini-fritattas

Baby Naming for the Peanut

Last weekend, we hosted a naming ceremony for our little peanut at our home.  Traditionally, Jewish events like this require a spread of bagels, cream cheese, lox, tuna, and various other cheese, fish, and veggie sides for the bagels.  Sometimes there are also knishes, or noodle kugel, but the basics are the same and catered from the local bagel shop or deli.  I was all ready to serve this menu to my guests, but somehow it didn't feel right.  First, when you really take a look, it's not a well balanced menu - where are the veggies?  And who decided it's a good idea to serve a potato or pasta dish as a side to enormous bagels - can anyone say carb overload?  Also, as a person who loves to cook (and writes a blog about how important cooking is!), buying all pre-made food for such an important event seemed wrong.  And my final reservation was that while I love bagels, I actually don't really like most of the traditional accompaniments.  Yes, I'm admitting on the internet that I'm a Jew who doesn't like cream cheese, lox, tuna, whitefish salad, etc.  Not that I need to like every food I serve to guests, but I just thought I could do better!

So after gaining assurance from my mom, hubby, and friends that I wasn't completely insane for making food for my 35 guests while taking care of a toddler and 3 month old, I came up with a menu.  My mom insisted that if I was inviting guests to a Jewish event on a Saturday at noon, they were going to expect bagels, and I certainly didn't want to disappoint!  So I decided to get bagels with some of the fixings, but make a few extra dishes to round out the meal.  The theme was small, individual portions so that guests could easily take a little of everything without having an obscene amount of food on their plates.  With that in mind, after much deliberation and recipe searching, the final menu is below.  Some of my old standby recipes made a comeback, along with a handful of new ones that turned out to get rave reviews!  In the end, I'm so glad I was able to put my personal touch on the food served on this very special day in my baby girl's life, and was rewarded with enough compliments on the food to make all of my work worthwhile :).


Lunch


Dessert


*New recipes - links will be added as I post these!